How to Install an Arzel Zoning System
Wondering how to install an Arzel Zoning system? We’re proud to say that our installation process is easy! HVAC professionals will be pleasantly surprised to find that they already have most of the skills they need to install an Arzel Zoning system. Here’s what you need to know.
How to Mount the Control Panel
The first step in how to install an Arzel Zoning system is mounting the control panel. The location of the panel can be very important. Mount it in the wrong place, and your customers might be unhappy. Why? Well, the only source of noise on the whole Arzel system is inside the panel box. A sturdy little pump creates the pressure and vacuum that the dampers need in order to open and close.
The Arzel pump is not very loud, and when it’s enclosed in our panel box, it’s quieter than most modern refrigerators. However, mounting the control panel in the wrong location can allow vibration transfer, which could cause unintended noise.
The best place to mount an Arzel Zoning system is on an exterior wall, anchored to a piece of three-quarter-inch plywood. This prevents vibration noise that hollow interior walls can amplify.
If you don’t have access to a block wall, you can mount the panel on an interior wall. You should still mount the panel to a three-quarter-inch piece of plywood. Make sure it’s spread across three studs to provide firm support down to the floor or foundation. This will minimize the potential for vibration transfer.
There are also some mounting locations you should avoid. First, don’t mount the panel on a wall that has frequently used spaces or stairwells on the other side. Most importantly, never install the control panel on the equipment or the return duct. If you mount it on the return duct, it’s possible for the pump vibration to echo in the duct and be heard throughout the ductwork.
Our Most Popular Damper Variety
Our most popular damper is the EzySlide® damper. EzySlides come in round sizes in a diameter of 4–16 inches, and rectangular sizes from 4–30 inches wide. The EzySlide dampers all offer a simple cut-in design whether you’re working with branch or trunk dampers. All of our dampers have a three-quarter-inch gasket that provides the best seal possible so air doesn’t bleed by the damper blade.
We also offer custom sizes, and you can order these through your local distributor or call us to see what’s available. Custom dampers usually ship within one or two business days, from our factory in Cleveland, Ohio.
How to Install EzySlide Dampers
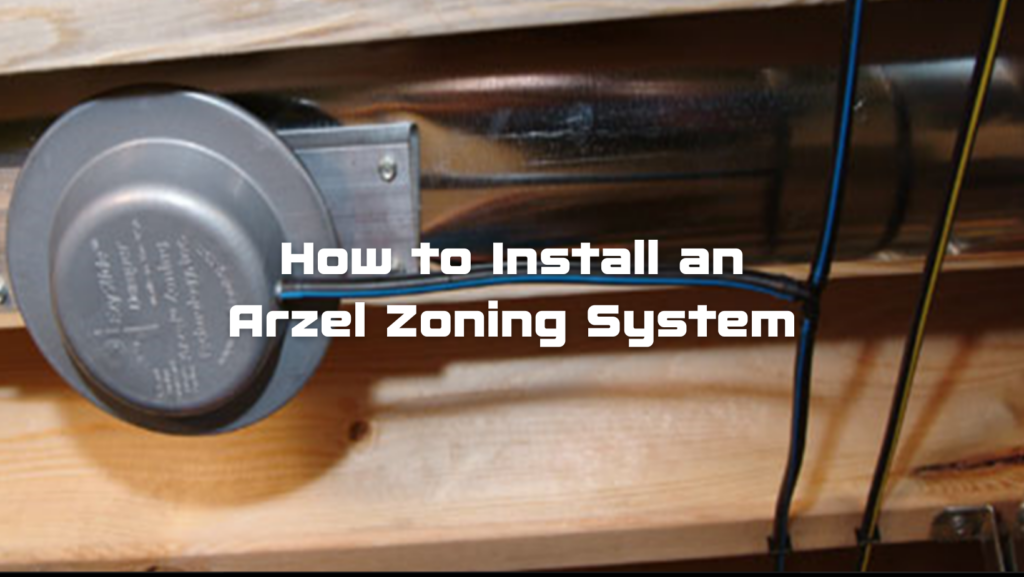
Our round EzySlide dampers come with a template sticker. To install, mount the template on the ductwork, and cut it out on the triangular line. Each template has 2 sizes on it, so make sure you find your damper size and cut out the right triangle. Then insert the damper sideways, holding the blade with your finger so it stays in the closed position. After that, turn the damper 90 degrees.
You’ll notice that there’s a nipple on one side of the damper. That’s where the pneumatic tubing will connect to each damper. When you turn the damper, point the nipple toward the equipment (or against the airflow). This step is optional, but it will help keep your tubing neater for a cleaner installation.
When the damper is in place, fasten it to the duct with four one-inch zip screws. Finally, attach the tubing.
See our video demos to watch a round EzySlide installation or see a rectangular EzySlide installation.
Using the Arzel Air Tubing
One of our favorite steps in how to install an Arzel Zoning system is connecting the dampers with our tubing. We love this step because it sets us apart from other HVAC zoning manufacturers. Instead of connecting your dampers with 24-volt wiring, possibly adding extra transformers, our process is simple and quick.
Arzel tubing comes in eight different colors. We recommend making each zone a different color so that you and future service techs can easily see how the zoning system is set up.
When you have more than one damper on a zone, you can connect them quickly and easily with our tee fittings. Simply run a piece of tubing from the panel to the farthest damper on that zone. Then move to the next farthest damper, and cut the tubing that you already ran. Use a tee fitting and a short piece of tubing to connect this damper. Then continue until of the dampers on the zone are connected. See how easy it is to install our pneumatic tubing.
We also offer a few other fittings that might be helpful with installation or troubleshooting. Our couplings just connect two pieces of tubing, and they will save your installation if you cut a piece of tubing too short.
Our plug fittings are helpful for troubleshooting. If you find a leak on a zone, you can pull all of the dampers off of the tubing, plug the end of the tubing, and start reattaching the dampers one at a time. If you see the pressure drop, you’ll know you have a bad damper. So the plugs speed up damper troubleshooting.
We also offer elbow fittings that will help you make a hard 90-degree turn with the tubing. Most of the time the tubing is pliable enough to bend without elbow fittings, but some contractors like to use the elbow fittings to avoid kinking the tubing.
Retrofit Damper Options
Our EzySlide dampers are already a great option for retrofit zoning installations, but we have more! Our internally mounted dampers make zoning possible when it’s difficult to access the ductwork. Use them when there’s a finished basement, or even if the homeowner is planning to finish their basement. That way you’ll be able to get to the dampers in the future if there’s ever a problem.
Our internally mounted dampers require air tubing that runs inside the ductwork. We offer plenum tubing for this purpose, and it’s UL rated for fire and smoke.
Our RegiDamper sits right underneath the register grill. You will put in two screws to fasten it, then silicone it in place. Then you’ll run your tubing through the ductwork to a centralized location, and tie it into your panel from there. The only drawback to the RegiDamper is that it does not have a gasket seal like the rest of our dampers. There will be some bleed by with RegiDampers. Still, it’s a good option when no other damper type will work.
The EzyFit damper folds in half like a taco. You can reach through the register boot into the attached round duct, and insert the EzyFit. A magnet holds it securely in place, so it does require metal ductwork. EzyFit has a gasket seal, just like EzySlide dampers. Like the RegiDamper, you’ll run the tubing for EzyFits through the duct to a centralized location. EzyFits are very reliable, with a glass-lined cylinder actuator and a graphite plunger that energizes or de-energizes the damper.
Finally, the InsertaDamper is a good fit for slab homes with clay or PVC ductwork. The InsertaDamper has a metal band that you can squeeze to make it fit around corners. If you have access to the main trunk line near the place you want your InsertaDamper, you can squeeze the band, slide it in, then let go. Again, run your tubing through the ductwork.
How to Run the Plenum Tubing for Internal Mount Dampers
Now you know the ins and outs of how to install an Arzel Zoning system. But you’re probably still wondering how to install the tubing for the RegiDamper, EzyFit damper, and InsertaDamper. There are a few options.
Using Fish Tape to Run Plenum Tubing
Most contractors use fish tape, like what you would use for running a wire. First, you’ll cut an access hole that will let you look inside the ductwork and see the fish tape when it comes down the duct. Then put a ping pong ball on the end of your fish tape, which will prevent it from getting stuck in any of the seams in the sheet metal. Fish it through the register all the way back to your access hole.
When you can see the fish tape through your access hole, use a long metal pole with a hook to grab it. You might use a dryer vent cleaner, which comes in two-feet sections that you can screw together.
You can either attach the tubing to your fish tape from the beginning, or you can use string instead. String is a little easier to work with, but there is one more step. After you have pulled the string through from the register to your access hole, you’ll attach the tubing to the string, then fish it back through to the register. Either way, you now have a piece of tubing running through the duct that can attach your damper to the control panel.
Using a Ductwork Vac to Run Plenum Tubing
If you do ductwork cleaning, you already have a ductwork vacuum. You can use the ductwork vac to pull the Arzel tubing through the duct. Tie a plastic back on a string and use the vac to suck that bag through the ductwork. Then tie your tubing to the string, and pull it back through.
Make a Service Loop Either Way!
Finally, keep in mind that you might need access to these dampers in the future if there’s ever a failure. To make sure you have this, make a service loop in the tubing. Just make a loop in the tubing, then put it behind the damper in the duct. Now you’ll be able to pull the damper out the same way it went in.
Zoning System Layout Example
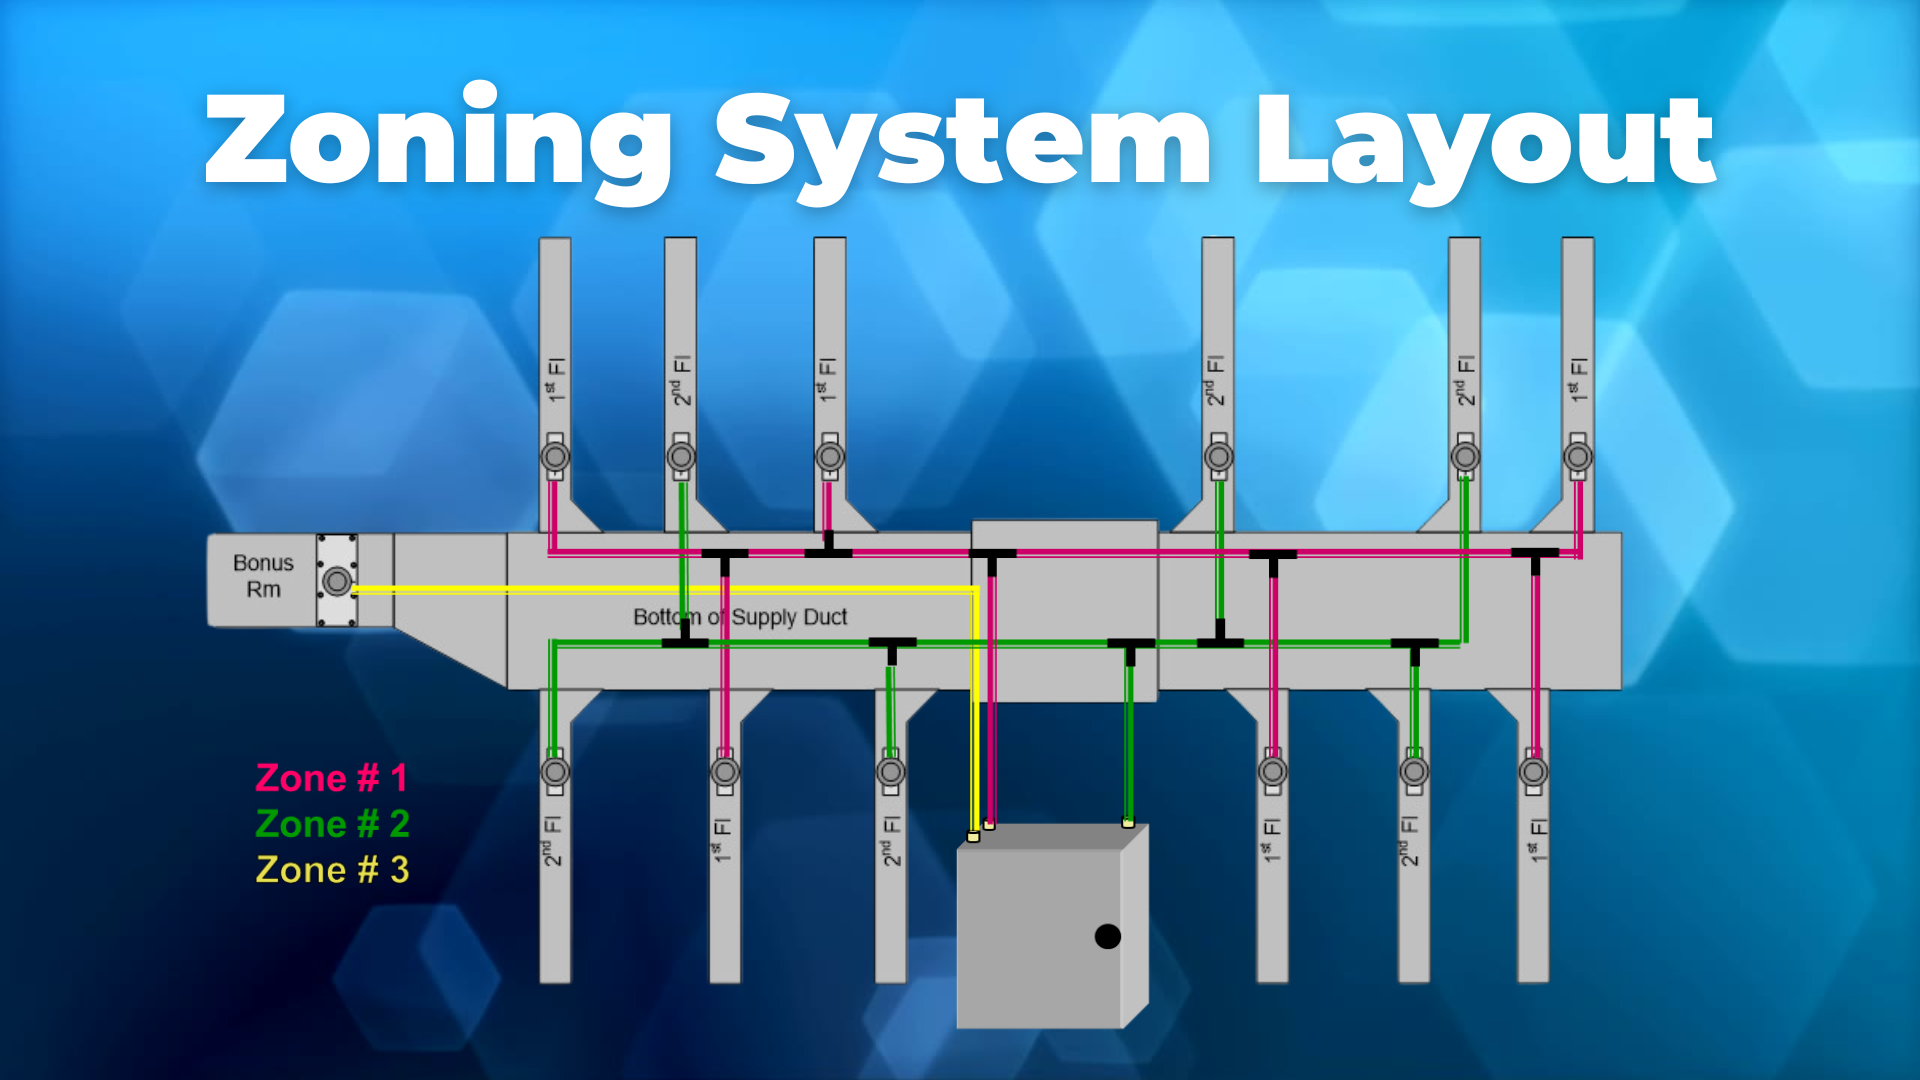
Here’s what a basic zoning system layout could look like. As you can see, the zones are color-coded so the contractor can easily tell which dampers are on each zone. When you are ready to run the tubing, you’ll start with the farthest damper on a zone. Choose a color, and plug the tubing into that zone. Then work your way back to the panel. Each time you get to another damper on the same zone, cut the tubing, install a tee, and connect the next damper. The tubing is quick and easy to install, and there’s no wiring for the dampers. That’s why we are so proud of our quick installation time.
You can see in the example that this system uses a combination of trunk dampers and branch dampers. Zone 3 (the yellow zone) only needs one rectangular trunk damper. Zones 1 and 2 use branch dampers. You can use both branch and trunk dampers on the same zone if you need to. You can also include some internal mount dampers like the EzyFit, InsertaDamper, and RegiDamper. The ability to mix and match damper types makes it possible to zone more systems.
All of our standard panels can power 35 damper actuators. If you need to use more than 35 dampers, we can make a custom panel with a double pump, and this panel can handle 70 damper actuators. You won’t need any additional transformers because all of the dampers are pneumatically driven.
Resources You Can Use
If you’re ready to start installing Arzel Zoning systems, here are some more resources to know about:


